Table of Contents
728x90
1.꾸미기 --> 스킨편집 클릭

2. html 편집 클릭

3. HTML 에 다음 코드 넣기, 총 3군데
<!-- 1.TOC -->

<!-- 1.TOC -->
<script src="https://cdnjs.cloudflare.com/ajax/libs/tocbot/4.11.1/tocbot.min.js"></script>
<link rel="stylesheet" href="https://cdnjs.cloudflare.com/ajax/libs/tocbot/4.11.1/tocbot.css">
<!-- 1.TOC -->
<!-- 2.TOC -->

<!--2.TOC-->
<div class="toc toc-fixed"></div>
<!--2.TOC-->
<!-- 3.TOC -->
웹브라우저의 새 탭을 열어서 내 블로그에 있는 아무 글이나 클릭해서 화면에 띄우기
그 다음 키보드의 F12 누르기


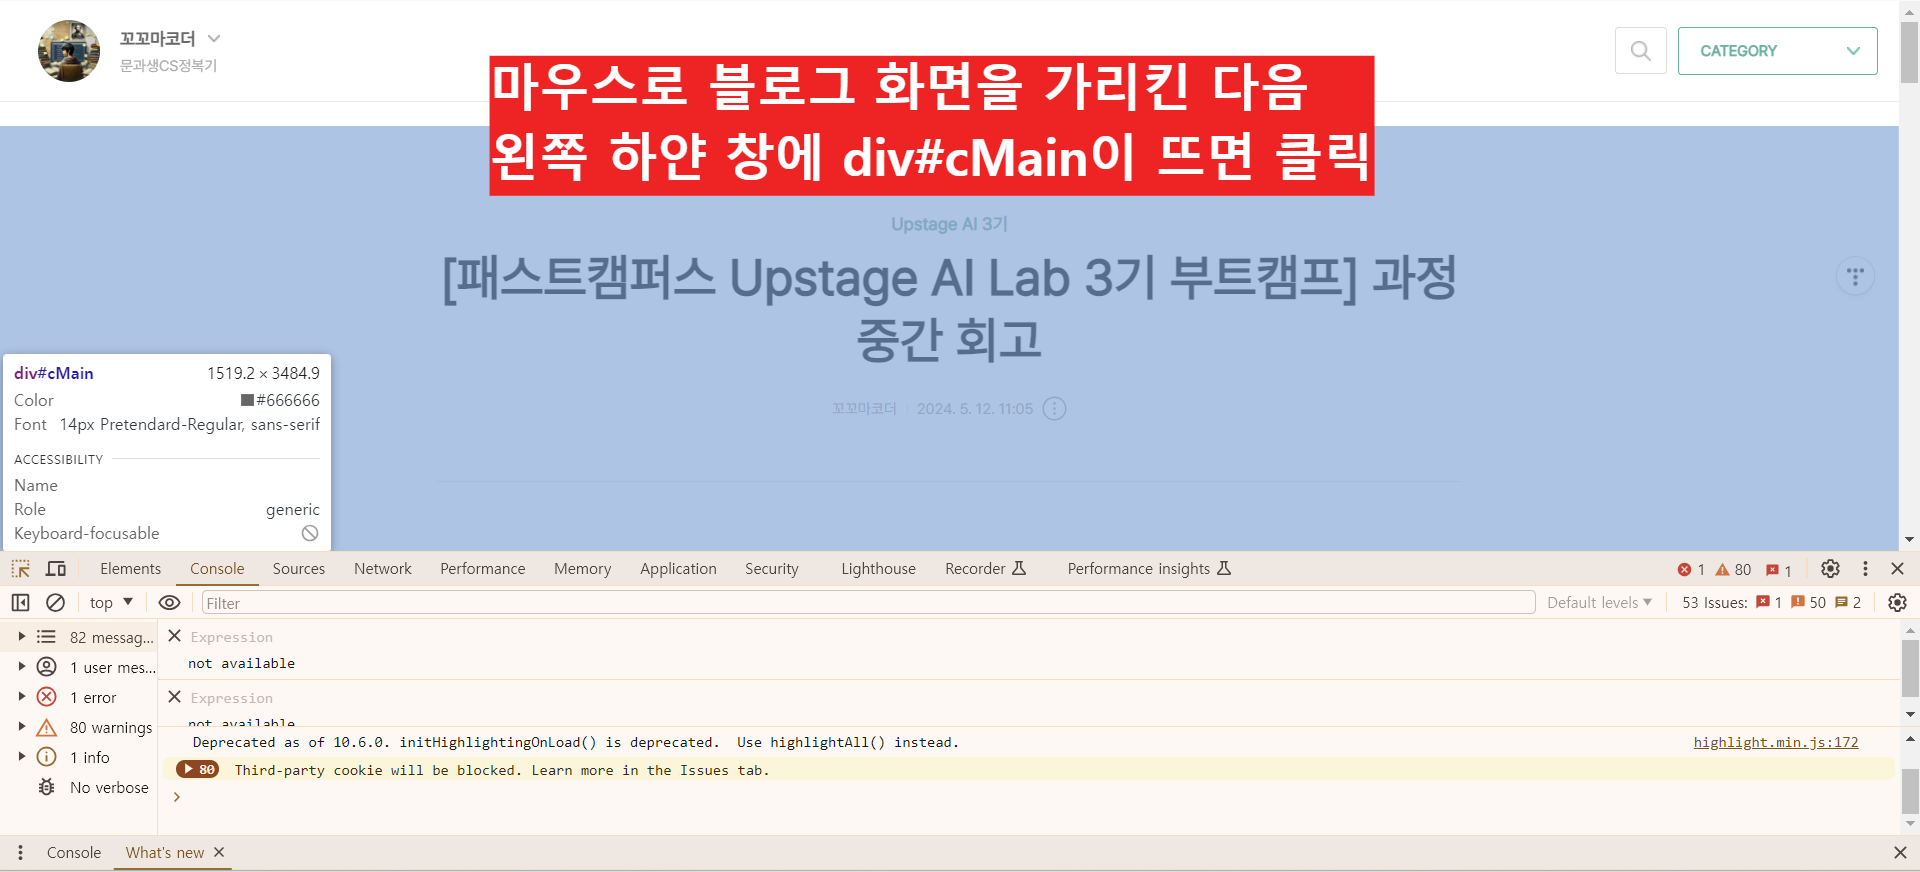


아래 코드를 복사해서 넣었으면 .markdown-body 부분을 모두 아까 복사했던 dkContent 로 고쳐주기
<!-- 3.TOC -->
<script>
  document.addEventListener("DOMContentLoaded", function () {
    #var content = document.querySelector('#.markdown-body');#<---이 부분을
    var content = document.querySelector('#dkContent'); #이런 식으로 dkContent 이름으로 바꿔주기
    var sidebar = document.querySelector('#sidebar');
    var headings = content.querySelectorAll('h1, h2, h3');

    var headingMap = {};

    Array.prototype.forEach.call(headings, function (heading) {
      var id = heading.id ? heading.id : heading.textContent.trim().toLowerCase()
        .split(' ').join('-').replace(/[\!\@\#\$\%\^\&\*\(\):]/ig, '');
      headingMap[id] = !isNaN(headingMap[id]) ? ++headingMap[id] : 0;
      if (headingMap[id]) {
        heading.id = id + '-' + headingMap[id];
      } else {
        heading.id = id;
      }
    });

    tocbot.init({
      tocSelector: '#sidebar',
      contentSelector: '#dkContent',
      headingSelector: 'h1, h2, h3',
      hasInnerContainers: false
    });
  });
</script>
<!-- 3.TOC -->
4. CSS 클릭 --> 코드추가, 총2군데

/* 1.TOC */
맨 윗부분에 넣기
@charset "UTF-8";
/* 1.TOC */
#sidebar {
  position: fixed;
  top: 165px; /* Adjust based on your header height */
  left: 10px; /* Adjust based on your layout */
  width: 250px;
  background-color: #fff;
  border: 1px solid #fff;
  padding: 10px;
  box-shadow: 0 2px 4px rgba(0, 0, 0, 0);
  max-height: calc(100vh - 200px); /* Adjust based on your needs */
  overflow-y: scroll; /* Enable scrolling */
  scrollbar-width: none; /* For Firefox */
  -ms-overflow-style: none;  /* For Internet Explorer and Edge */
}

#sidebar::-webkit-scrollbar {
  display: none;  /* For Chrome, Safari, and Opera */
}


#sidebar .toc-list {
  list-style-type: none;
  padding-left: 0;
}

#sidebar .toc-list li {
  margin-bottom: 8px;
}

#sidebar .toc-list li a {
  text-decoration: none;
  color: #333;
}

#sidebar .toc-list li a:hover {
  text-decoration: underline;
}
/* 1.TOC */
/* 2.TOC */
맨 아랫 부분에 넣기
/* 2.TOC */
.toc-absolute {
  position: absolute;
  margin-top: 24px;
}
.toc-fixed {
  position: fixed;
  top: 165px;
}

.toc {
  left: calc((100% - 1020px) / 2 - 250px);
  width: 250px;
  padding: 10px;
  box-sizing: border-box;
}

.toc-list {
  margin-top: 14px !important;
  font-size: 0.9em;
}

.toc > .toc-list li {
  margin-bottom: 14px;
}

.toc > .toc-list li:last-child {
  margin-bottom: 0;
}

.toc > .toc-list li a {
  text-decoration: none;
}
/* 2.TOC */
5. 적용 클릭

6. 내 블로그 글 클릭 --> 문단모양 제목1, 제목2, 제목3 으로 쓴 글이 왼편 사이드 바에 목차로 뜨는지 확인
'블로그' 카테고리의 다른 글
| HRD-net(고용24 직업훈련 출결관리) QR 출결체크 개선해야 할 부분들 (5) | 2024.09.27 |
|---|---|
| 디스플레이 해상도 변경이 안될 때 (0) | 2024.09.10 |
| 서울특별시의 구 별 동 (0) | 2024.07.16 |
| 아파트에서 와이파이 인터넷 속도 느림 끊김 -> 빵빵 터지는 법!! (0) | 2024.04.20 |
| [티스토리] 블로그에서 접은글 토글/접기/펼치기 만들기 (0) | 2024.04.05 |
250x250
공지사항
최근에 올라온 글
최근에 달린 댓글
- Total
- Today
- Yesterday
링크
TAG
- Lora
- LIST
- English
- LLM
- #패스트캠퍼스 #패스트캠퍼스ai부트캠프 #업스테이지패스트캠퍼스 #upstageailab#국비지원 #패스트캠퍼스업스테이지에이아이랩#패스트캠퍼스업스테이지부트캠프
- clustering
- Array
- 손실함수
- 오블완
- Hugging Face
- 코딩테스트
- PEFT
- recursion #재귀 #자료구조 # 알고리즘
- Numpy
- 파이썬
- Github
- nlp
- #패스트캠퍼스 #패스트캠퍼스AI부트캠프 #업스테이지패스트캠퍼스 #UpstageAILab#국비지원 #패스트캠퍼스업스테이지에이아이랩#패스트캠퍼스업스테이지부트캠프
- #패스트캠퍼스 #UpstageAILab #Upstage #부트캠프 #AI #데이터분석 #데이터사이언스 #무료교육 #국비지원 #국비지원취업 #데이터분석취업 등
- 해시
- 티스토리챌린지
- cnn
- 리스트
- Transformer
- RAG
- classification
- t5
- speaking
- git
- Python
| 일 | 월 | 화 | 수 | 목 | 금 | 토 |
|---|---|---|---|---|---|---|
| 1 | ||||||
| 2 | 3 | 4 | 5 | 6 | 7 | 8 |
| 9 | 10 | 11 | 12 | 13 | 14 | 15 |
| 16 | 17 | 18 | 19 | 20 | 21 | 22 |
| 23 | 24 | 25 | 26 | 27 | 28 | 29 |
| 30 | 31 |
글 보관함